Monday, April 16, 2012

Chickens in the Suburbs

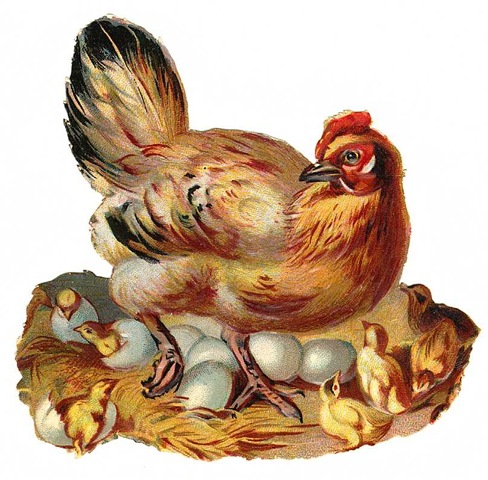
I haven't posted very much the last week because I have been living a whirlwind.  I have a lot to catch up on, but wanted to briefly mention that I just walked in the door from the Summerside City Council meeting where my permit application for four laying hens was approved! (See previous posts here and here.)  I am so excited and feeling so positive about the support that our city has shown for our community garden initiative and my laying hen application.

I know that each municipality will have different application requirements, but I thought that by posting my final application letter, it might give other hopeful chicken aficionados at least a starting point for information to include.  So here is the body of the letter that I wrote:


Further to our conversation on February 8th, 2012, I am submitting my formal application for a permit to house four pet laying hens in our backyard, which is within city limits.  I have obtained the signatures of residents in the twelve houses that are within 200 feet of our property, and include these signatures on the appropriate form with this application.  For those residents with further questions, I addressed their questions and/or concerns while speaking to them and gave them an informational handout that addresses the most common questions about backyard laying hens (a copy of this handout is also included in this application).

These hens will be considered family pets, not livestock, and will be kept for enjoyment, eggs, and as a way to educate our children on the responsibility of raising animals and the knowledge of how and where we get our food.  We are concerned about the inhumane conditions that industrial laying hens are exposed to and, while we do enjoy eating eggs, we prefer to get our eggs from hens that are happy and allowed to live comfortable, natural lives.  We will make an effort to ensure that the hens are docile, gentle animals, and we will treat them with the respect that any pet or living creature deserves.

I live in the ________ subdivision in Ward 8 (Wilmot), and would like to build an attractive and secure coop in my backyard behind my shed where the chickens would be out of sight and protected by trees and shrubs.  I am applying only to have female laying hens, and as there will be no rooster, there will be almost no noise associated with these chickens.  I have decided upon a coop plan, and will connect the secure, warm, and safe coop to a fenced-in outdoor pen that will allow the hens to safely and conveniently make use of the outdoors for exercise and feeding.  The pen will have wire on all sides, including the top, to keep out avian predators.   This pen will most closely resemble a modified dog run.  I have attached a copy of the chicken coop plan with this application; the pen will be planned more in detail when the coop is built and the site is further assessed in the spring for how to best go ahead with construction.

Waste litter from the chicken coop will be composted on our property in the bottom corner of our yard where it is protected by shrubs and trees and is at the point furthest from all surrounding houses.  It will contain yard waste such as fallen leaves and twigs, and be managed properly (turned and aerated regularly) so should not produce any offensive odors.  The chickens’ feed will be kept indoors so as not to attract any unwanted pests.

I have good relations with my surrounding neighbours and plan, if this application is successful, to deliver fresh eggs a few times a year to the households immediately adjacent to our property and offer rich compost to those who garden in order to keep up a friendly and positive outlook regarding the hens.  We currently do not own any other pets.

I understand that a city official will visit our property to take photos of the backyard and the location where the chicken coop is to be constructed, and will inspect the property at that time.

I trust that I have addressed the questions and conditions associated with this application, and I hope to hear from you soon in this regard.  Thank you very much for considering my application.

I can't wait to post the pictures of our coop and newly acquired ladies!  In the meantime, send me your best chicken care tips; I have lots to learn!


Wednesday, April 11, 2012

Growing a Sourdough Starter from Wild Yeast

I should say before I write anything else that I am NOT a sourdough expert.  I have not yet baked a loaf of sourdough bread.  My sourdough journey is in its initial, tentative steps.  But I have successfully gotten a sourdough starter going from wild yeast, and I am quite proud of it.  I can get you at least that far, and then hopefully if you return to my blog I will have had luck with the baking step--if not, I'll be pointing you to other blogs and websites for further reference!

I have seen recipes for sourdough online, and in my favourite cookbooks, and most of them start with a "cheater" starter using commercial yeast.  That's ok, if it turns out for you and you like it, but being a biologist I thought it would be a lot more interesting to start my own.  When I read that you could "capture" wild yeast to develop your starter, it sounded infinitely more exciting to me!

It is so easy to do, and I am glad that I tried.  I even abused my poor starter a little bit, and it is still going.  It needs to get a little stronger before I attempt bread again (my first shot at it was pretty miserable) but even the fact that it is living on top of my fridge seems amazing to me.  I got the instructions/recipe for one technique of getting a starter going from this post on The Fresh Loaf website and followed the directions with the ingredients that I had.  It takes time to develop a starter, it is certainly not closely related to instant or even regular active dry yeast.  It takes patience, clean dishes and hands, and a lot of love.  But you can totally do it in your kitchen!  All you need is some whole grain flour and pineapple or orange juice.  So let's get started:

As you can see, I used regular Robin Hood whole wheat flour.  I think if you can get organic stone-ground rye, like I have since purchased from the Bulk Barn, it would be better.  However, mine worked with the flour I used.

Day 1
Combine 2 tablespoons of whole wheat or rye flour with two tablespoons of juice. Mix well, and cover lightly (I used a piece of cotton dishtowel held in place over a mason jar with the screw band).  Keep it in a warm place, like on top of your refrigerator.


Day 2
Add another 2 tablespoons of w.w. or rye flour and two more tablespoons of juice.  Mix well again, and re-cover.

Day 3
Add yet another two tablespoons of both flour and juice.  Mix it up, cover it up, sing it a little song.

Day 4
Open up your starter, stir it all up, measure out 1/4 cup and then discard the rest.  Wash out your jar, and return your 1/4 cup of starter to it.  Then add 1/4 cup of unbleached all-purpose flour, and 1/4 cup of warm filtered water.  Stir it all up nicely, cover it back up, and put it back in its warm little nook.

After Day Four
Continue the Day 4 steps of stirring, discarding, and adding flour and water to it until you start to see some really bubbly action, the starter begins to expand, and you smell a characteristic yeast scent when you give it a sniff.  I'd keep it going for a while.  I noticed my starter took off in the evening of day 5, but I am now at day 15 and still have it on my counter, feeding it at least once daily and sometimes twice if I think it seems hungry.  You want to get it strong enough to to really be able to leaven your bread when you use it to make a sourdough loaf, and it takes a little while to get there.  Some people recommend at least two weeks.  Trust me, you want it strong.  I would show you a photo of my horrible first attempt at loaves if I hadn't been so ashamed of them that I threw them out to the birds and didn't take a picture!

My sourdough starter on Day 7, ready to be fed.

According to SourdoLady (the user who posted the procedure on The Fresh Loaf), when you feed it you can actually keep less starter than even a quarter cup, for instance 1-2 tablespoons.  I personally keep holding onto 1/4 cup because I am worried that something will happen and I will have thrown it all away and have to start over again.  But you should give it more water and flour in order to feed it properly.

To feed your sourdough starter, it is basically the same as the Day 4 step.  You discard most of your starter, mix it up with flour and water, and let it go crazy eating and growing.  From what I have read, you should feed it equal portions by weight water and flour, which comes out with a quantity of almost double the flour if you measure using cups.  Basically, when you mix it up, it should look like thick pancake batter.

When your starter stops expanding, starts to sink back down, begins to smell more like alcohol than yeast, and gets a layer of clear or yellowish liquid near the top, it is hungry and really needs to be fed.  After your starter gets going and becomes strong, you don't have to keep it at room temperature anymore.  You can feed it, put it in the fridge, and leave it.  Weekly feedings are recommended but if it's strong, it can go even longer than that and still be revived when you take it out to get it ready for baking.  I really should have taken before and after photos to show you the difference in volume from where it starts before a feeding and ends up later; I may edit this later and add one in. :)

Starter on Day 10, ready to be fed.

The way I have described feeding it, you'll never really have more than about 3/4 cup of starter, and when you bake, you'll probably need at least a cup plus some left over to keep your starter going for the next time.  If you want to increase it, the feeding before you plan to use it (say the night before), just give it a bigger feeding.  That will increase its volume to what you will need.  And when you feed it, the quantity that you discard can be put to use; it doesn't absolutely have to be thrown away. You can give it to a friend to start his/her own starter, or you can use it in a recipe like sourdough pancakes (note: I haven't made these yet, they're on my to-do list and if anyone is interested I'll post the results up here when I do it).

Good luck!  I am still learning, and my starter has in the last couple of days had a couple of near-death experiences.  If you check out the post I linked to earlier where I learned how to do this and have a look at the enormous comment thread, you'll get loads of help.  Also check out this post by Tamatha at A Flock in the City; she is amazing and knows all sorts of things about baking and fermenting and looking after various cultures.  She actually posted a sourdough bread recipe today, than I plan on trying as soon as my starter seems a bit more hearty!

This post is shared with Simple Living WednesdaysFrugal Days Sustainable Ways and Homestead Barn Hop #58.

Sunday, April 8, 2012

Oatmeal Whole Grain Pancakes

We love eating pancakes.  They are frequently requested by James, and we eat them almost every weekend.  Sometimes I even make them throughout the week.  Now that we have young children, I find that one of the best ways to visit with our friends who also have children is to host breakfasts rather than suppers--everyone is fresh and at their best for the day (and we're all up early anyway), you can cook a no-fuss meal and be completely casual and relaxed, and after breakfast you still have time to visit while the kids play. Once everyone goes home, there's still much of the day left to get things done, spend time with family, do your grocery shopping, go to the park, etc.

This recipe is a great one if you are having friends over (or if you have a lot of children!) because it makes so many pancakes, and with the oats and whole wheat, you feel a little better about serving them.  If we make it for our family alone, the leftovers are still great popped into the toaster through the week for a quick breakfast or snack.  My mother-in-law gave me the Robin Hood Home Baking cookbook last year for my birthday, which is where I got this yummy recipe.  And I haven't made anything in that cookbook yet that hasn't turned out to be delicious.  This one, however, is the recipe that we most often prepare!

The necessities.  And despite the supermarket egg carton, those are farm fresh eggs from the Summerside Farmers Market!


Oatmeal Whole Grain Pancakes - adapted from Robin Hood Home Baking

1 1/2 cups rolled oats
2 cups milk (*or almond milk, if you're dairy free*)

3 eggs
1/4 cup vegetable oil
1 tsp vanilla

1 cup whole wheat flour
2 tbsp brown or granulated sugar
2 tbsp baking powder
3/4 tsp salt
1/4 - 1/2 tsp cinnamon

In a small bowl, combine milk and oats.  Set aside until milk is mostly absorbed.  Meanwhile, preheat your griddle to about 350 F.


In a large mixing bowl, combine flour, sugar, baking powder, salt, and cinnamon.  Stir well.


Add eggs, oil, and vanilla to oat mixture.  Beat well.  Add oat mixture to flour mixture all at once, mixing until smooth.

I promise I put vanilla in there too!  Just not before I took this picture.

Here it is, ready for the griddle.


Spoon batter by 1/4 cupfuls onto griddle.  Cook for 2-3 minutes or until bubbles break on the surface and bottoms are golden, turn and cook for 2 or so minutes more until bottoms are lightly browned.  Serve hot with maple syrup, fresh fruit, yogurt, caramelized apples, whipped cream, etc.


Mmmmm... yummy pancakes.  I'm sorry I have to leave you with this photo, but we got so busy eating them that I didn't take a "pretty" photo of them stacked on a plate and drizzled with beautiful Canadian maple syrup!
I hope you enjoy this recipe as much as we do!  And that you're having a wonderful and blessed Easter holiday.  He is risen.

This post is shared with Homestead Barn Hop #57 at The Prairie Homestead.

Easter Sunday

He is Risen.

Now we can lean on his strength to weather the storms we face in life.  So thankful today for God's gift to us and for the beautiful family He has given me.


With another spring snowstorm on PEI today and most church services cancelled, we're staying warm and snug at home.  But the snow will be gone soon, and we'll have the hope of sunshine, new life, and a bright future just as we have spiritually today.

Wishing you all a happy and blessed Easter!

Friday, April 6, 2012

Another Multigrain Bread to Try

We ran out of bread yesterday and I had to (gasp) buy a loaf.  I actually really mind doing that because I am very rarely pleased with what I bring home.  My parents buy bread at the bakery in Kensington and I really like that bread, but otherwise, I am pretty picky and only like homemade.  However, I had a lot going on and kept putting off the (easy and fast) dough making process, until the point where we ran out. Then this morning, our bought loaf was almost gone.  I didn't really have time to wait the 15 or so hours for a loaf of my no-knead recipe, so I dug out a recipe book and tried a regular "knead and have bread in two-three hours" type of recipe.  Here are the results.

Adapted from Better Homes and Gardens New Cookbook 15th edition; Mixed-Grain Bread
Mixed-Grain Bread

1 cup whole wheat flour
1 cup all-purpose flour
2 packages active dry yeast (4 1/2 tsp)

1 1/2 cups milk
3/4 cup water
1/2 cup cracked wheat (I used Red River Cereal)
1/4 cup cornmeal
1/4 cup packed brown sugar
3 tablespoons vegetable oil
1 1/2 tsp (1/2 tablespoon) salt

1 1/2 cups additional whole wheat flour
1/2 cup rolled oats

1 1/2- 2 cups additional all-purpose flour

In a large mixing bowl, combine 1 cup each of whole wheat and white flour with dry yeast, set aside.

In a saucepan, combine milk, water, cracked wheat, cornmeal, brown sugar, oil and salt.  Heat and stir over medium-low heat just until it becomes warm, between 120 and 130 F.  Add this warm milk mixture to the flour mixture, and beat on low speed with an electric hand mixer for 30 seconds, scraping the sides of the bowl.  Then beat on high speed for three minutes.

It's weird for me to use a hand mixer during the bread making process!  Not entirely unpleasant, however.

Using a wooden spoon, stir in the next 1 1/2 cups of whole wheat flour, and the 1/2 cup of rolled oats.  I used quick oats this time.


Then mix as much of the remaining white flour as you can into the dough.

Turn the dough out onto a lightly floured surface, and knead in enough of the remaining all-purpose flour to make a moderately stiff dough that is almost smooth and elastic, about 8 minutes of kneading should do.  *I used about a cup of the all purpose flour after mixing in the whole wheat and oatmeal.

Shape the dough into a ball, and place in a lightly greased bowl, turning over to grease the whole surface of the dough.  Cover, and let rise in a warm place until double in size, about one hour.

Dough immediately after kneading.

Dough after an hour sitting in the sunshine on the floor in the dining room.

Punch the dough down, turn onto a lightly floured surface (mine wasn't floured, it didn't stick) and cut into two equally sized pieces.  Cover them (I used plastic wrap that had been over the bowl) and let them rest for ten minutes.

Shape each piece into a loaf and place in greased 8x4x2 inch loaf pans.  Cover again and let rise in a warm place until double in size, about 30 minutes.  While you're waiting, preheat the oven to 375.


Brush tops of loaves with water and sprinkle with additional rolled oats.  I used large flake oats for the top.


Bake for 30-35 minutes until bread sounds hollow when lightly tapped.  Immediately remove bread from pans, and cool your luscious loaves on wire racks.

My loaves. You may notice a slight discrepancy in size and shape--the second one fell victim to a small plastic jar of car-shaped gummy vitamins falling on it during the second rise.  I gave it time to recover, and put it in the oven when the first one came out, but it never quite regained it's proper shape or stature!

A shot of freshly sliced bread. 

Overall, I think this is a nice recipe.  When I first started baking the no-knead recipe, I wasn't sure how I felt about it.  It tasted different, it was denser and heavier, and it seemed almost a little TOO rustic.  But now that I'm used to it, I prefer it.  Now when I bake more "regular" homemade bread, I find it tastes really yeasty and sweet and is super soft.  That might be just the kind of bread you like--my sister tried it and liked it, and my husband (who isn't exactly effusive in praise about most homemade products) said it was really good.  So I do think it is a nice recipe, but I enjoy the other one more.  I find the "bits" in this bread more obvious when you're chewing it, because in the no-knead recipe, they have hours to absorb some of the dough's moisture and become softer.  Maybe you like your bits a bit bittier.  I'm not sure how I feel about it.

However, when I'm short on time and can't wait an entire day (or night) to have bread, I think this is a pretty tasty recipe and it's nice that it makes two loaves, rather than one, even though they are a little smaller than the loaves I'm used to.  If you have a favourite multi-grain whole wheat recipe, please pass it on!  I love trying new bread recipes.

This post is shared with Homestead Barn Hop #57 at Homestead Revival.

Thursday, April 5, 2012

Helping Hands Community Garden

Well, we will be gardening in Lefurgey Park this year, and hopefully, for many years to come!

Pumpkin seeds rearing their beautiful heads in anticipation of a new home.


After the municipal budget was delivered last week, we are now able to officially say that the city has given us permission to develop a community garden on municipal park land and they will support us by tilling the beds this year and providing two picnic tables for the garden.  This was wonderful news and we are so thrilled that they decided to go ahead with supporting our project!  I'm not sure how to describe how excited I am, I have been practically squealing since I found out.

Our committee (minus one member, who has the flu) met last night at my home to discuss our next steps. First of all, we needed a name.  We bandied about a few different possibilities, until a friend of mine suggested "Helping Hands Community Garden", which refers to the fact that twenty-five percent of the land will be used to grow organic vegetables for our local food bank and soup kitchen, and it seemed to ring just right in all of our ears.

We discussed roles of various committee members, how we would like the plots to look, what our expectations of gardeners are, what priorities we want to accomplish this year and what can wait until our second season, or even later.  We identified local businesses we would like to approach for help, community members that may be able to give us in-kind support, and came to the conclusion that we think we can be really frugal and run on a very small budget indeed.

I think we got off to a great start.  The individual members of the group have so much to offer already, between contacts, skills, knowledge, and enthusiasm--and although we have a lot to tackle if we want our garden up and running later this spring, I know we can pull it off.

I'll be updating further as developments arise, but wanted to share that, indeed, this community garden is a go!  We are very thankful to the City of Summerside, and in particular, Cory Thomas, who full-heartedly supported this idea in his role as city councillor.

We have the bare-bones beginnings, but it won't be long before there will be a fledgeling organic garden with newly emerging seedlings sharing hope for the future of sustainability and access to healthy, local food for everyone in the community.

If you live in the area and have any questions about the garden, how you can help, or how you can obtain a plot (there are some available!), please contact me and I'll get you sorted!  And bloggers--when everything is up and running, I plan to illustrate the steps involved in starting your own community garden.  A great way to dive into urban farming while working with your neighbours and friends!


A baby basil plant, destined to marry a succulent tomato.
*Quick note: these are seedlings grown from the seeds that I planted with James and have been patiently caring for under my grow light.  The pumpkin seeds were new, so I knew that they would grow.  The basil seeds are two years old, and still coming up with vigour!  The tomato seeds aren't doing much yet but seem to be swelling so I hope that that's a good sign, and I *think* I may have some luck with the germination of at least two butternut squash seeds!  So things in my little corner of the world seem to be going very, very well indeed.

This post is linked up to Garden Life at No Ordinary Homestead, Farmgirl Fridays, and Homestead Barn Hop at New Life on a Homestead.

Tuesday, April 3, 2012

Supporting Sustainable Meat in Your Community

I love eating.  I love thinking about food, preparing food, smelling food, and savouring food.  And when I know that the food was raised sustainably by a small-scale organic farmer who lives near my home, it tastes all the better.

Some of you may have watched the documentaries Food Inc. or Fresh and been impressed with Joel Salatin.  Maybe some of you have read one or two or all of his books (I haven't yet, but they are definitely on my to-read list!).  He makes an impression because he's honest, he's idealistic, he doesn't buy into the way meat is raised industrially, he's Christian and environmentally conscious (both big selling points for me!) and his farming techniques just make sense.  Most importantly, perhaps, is that his pastured poultry, pigs, and cattle all look happy and healthy.


I can honestly say that when I first saw him in Food Inc., I was immediately inspired.  As a meat-eating conservationist (I know, I know, some of you think that can't exist), his way of raising healthy livestock in a natural way by feeding them what nature intended just seemed so, absolutely but simply, right.  How can we convince everyone that their meat should be raised this way?  Do we have local farmers who make a conscious effort to do this?

I don't know about where you live, but here on PEI we have just such a farmer and we currently have an amazing opportunity to help him.

Raymond Loo is an organic farmer based near Breadalbane, and owns SpringWillow Farm.  He is recognized internationally as an Outstanding Organic Farmer.  He has been in the news numerous times for innovative farming techniques and products, and he is currently undertaking an interesting approach to raising pastured, organic pork, poultry and beef in a way that is financially feasible for small family farms.


Rather than going to traditional lenders to finance the increased costs of raising pastured meat for local consumers, he is embarking on a fundraising effort built on the CSA model that allows community members to help him by donating funds up-front in the spring, and then receiving their chosen type of meat in a package in the fall.  This allows him to have the necessary funds at the beginning of the season to raise the animals and make a profit without incurring debt, and is a model that might be very appealing  to other small farmers as a way of raising pastured meat for a local market.

You can learn more here.  If you live on PEI and are interested, check out the site and support him!  And if you don't live nearby but know someone who might benefit from this type of fundraising, then perhaps you could pass on the information and spread the idea to other family farmers in your community.

Initiatives like these can help us change the face of agriculture!  Please get involved in your local, organic farming community and support those who are working to change our system of growing, raising, harvesting, and delivering the food that we put on our tables.

This post is shared with Simple Living Wednesdays at Our Simple Farm and Homestead Helps Wednesday at Little Farm in the Big City.