Monday, April 30, 2012

I Made My Own Yogurt This Week

I realize that there are people out there who make their own yogurt (and cheese, and sauerkraut, etc.) without even giving it a second thought.  But to a newbie like me, successfully making yogurt is one of the most exciting things to happen to me lately!  I used instructions for making yogurt in a crockpot, because it sounded like the easiest and least involved way of doing it, and because I don't really use a crockpot all that often; it seemed to help justify it taking up space in my diminutive kitchen.  In the recipe I used, she sweetens at the beginning to end up with sweet, vanilla yogurt.  I wanted to master plain yogurt first, and since I knew I'd end up with quite a bit, I thought that it would be good to make plain and just sweeten it myself later.  That way I'd know just how much I liked, and I could use the plain yogurt for making savoury dishes.

It is so easy that you really should all do it.  All you need is a little patience, and a lot of time.  I know I never really want to buy pre-made yogurt again!  This is so simple, and with so few ingredients, that it seems like the very best way to get that fix of probiotic goodness into your belly.

In general, we've been eating Activia vanilla-flavoured yogurt, which costs $3.99 for 650 grams.  To make my yogurt a few days ago, I used a two-litre carton of milk ($3.49) and some of a 500 mL container of PC brand organic plain yogurt with active bacterial cultures (usually $3.99, but I got it on a great sale for $1.29!  Woohoo!).  I only needed a 1/2 cup of the yogurt, so the rest was eaten by me or went into a yummy recipe of raspberry yogurt muffins.  I ended up with 1.25 L of yogurt, about twice the amount of the Activia container, for $3.81, so saved quite a lot of money.

The necessities.
*Note that I used organic yogurt, but not organic milk.  This is because for the astronomical price of organic milk, you don't get any real, substantial difference in the quality of what you are purchasing.   In Canada, quality controls are so high on milk that there are no traces of antibiotics or any hormones in conventionally produced milk at all.  See this post for a great, quick summary of why non-organic milk is just as good for you.  Also, I think ADL is a super company that I want to support (and considering it is literally right around the corner from my house, you can't get much more local) and I know a number of dairy farmers on PEI who are all awesome people that I would like to support as well.

So as I take you through my yogurt making process, I'm going to give you the time details that I used this time, because it took me a long time to make this and this is something you might want to consider when you decide which day of the week you'd like to give yogurt-making a try.

7:00 am


Put your 2L carton of milk in the crock pot, cover, turn it on low, and leave for two and a half hours.  I used 2% milk to get a creamy but not full-fat version.  I thought it was a compromise between not wanting to get chubby myself, but wanting to feed the kids a hearty yogurt to help them (especially Susannah) put on weight. Apparently you can use whatever milk you like, including skim.

Did you really need this photo?  Probably not, but it adds colour to the post. :)
Another unnecessary but illustrative photo of my hot crockpot, filled with milk, and turned on to the low setting!


9:30 am


Your milk should be good and hot now.  Turn off the slow cooker, unplug it, and leave it without opening for another two and a half hours.

12:00 pm


Come back, take about a cup of milk out of the crockpot and whisk in 1/2 cup of plain, organic yogurt.  Make sure that it has active bacterial cultures in it!  That's what you need to do the work for you of converting your milk into more yogurt.  Stir that milk-yogurt combo back into the milk in the crockpot (make sure it is cool enough so you don't kill the bacteria, it should be between 100 F and 115 F or so, or so that you can comfortably keep the tip of a very clean finger in the hot milk without discomfort).  Once it is all mixed together, put the lid back on the crockpot and wrap a thick towel (I used two) around the whole thing, tucking it in as much as you can to keep the whole shebang as warm as you possibly can.  Leave it like this (no peeking!) for 8+ hours.


9:30 pm


I left mine a little longer than 8 hours, because I had a very important function to attend--our weekly ladies coffee date at Samuel's on Friday evening.  So when I got home, I unwrapped and opened my crockpot to find:

Success!
Yogurt!!

So at this point, you can package it up however you desire as is and stick it in the fridge, or strain it to make it thicker.  I decided to strain mine.

I lined two colanders (one big and one little) with coffee filters, put them over bowls, spooned the yogurt into them, and put them in the fridge for a couple of hours (not too long or it will turn into yogurt cheese, which I have read is lovely but not what you want in your smoothie or on your granola).  


Craig and I watched a (mind-numbing) movie while I waited for this to strain.  When it was done, I came upstairs and...

12:30 am

Took the colanders out of the fridge, scooped and scraped the yogurt out of the filters into clean Mason jars, poured the whey (don't throw it out!) into additional clean mason jars, and ended up with this:

Thick, creamy white yogurt on the right, whey on the left.
Whey can be used for all sorts of things, and I hope to try a bunch of them out and post about it in the future.  I'm planning on using this batch to enrich smoothies and make them probiotic, to substitute for buttermilk in baking, such as pancakes and biscuits, etc., and to substitute for water in bread, which I have heard has great results.

The yogurt, on the other hand:


I tried it on top of homemade granola, sweetened with some honey and a drop of vanilla, and topped with raspberries.  It was really good.  The yogurt itself was pretty tangy, which may be because I left it longer while out with friends.  I never eat plain yogurt, always sweetened and flavoured, so I think it might take getting used to.  But if you sweeten with honey and vanilla, you won't notice any difference except that it is fresher, thicker, and yummier.  And, you'll know exactly what went into it.  I don't think I'll go back to purchased yogurt.  This is less expensive, healthier, fresher, full of probiotic goodness, and very satisfying.

Don't forget to keep a little yogurt to make your next batch!

Sunday, April 29, 2012

Ode To A Clothesline

What a breath of fresh air, literally, now that clothesline season is back in full force.  I know some people let their clothes freeze solid on the line during the winter, and I think that's great--but mine was broken until about a week and a half ago and so I'm just once again starting to take deep breaths of springtime olfactory delight when I fall asleep on line-dried sheets or dry myself with that rough, outdoorsy scratchiness of towels straight in from outside.  I love my clothesline so much that my husband is getting tired of hearing me randomly blurt out "I love being able to use our clothesline again!"  And I felt it had to be expressed here, in words and images.

Five Reasons I Love My Clothesline


1)  The way the clothes smell when you bring them inside.  I think I already covered this, but it has to be included; isn't it everyone's favourite thing about clotheslines?  That smell of fresh air, ruddy cheeks, freshly mown grass, dried leaves, hyacinth perfume, bird song, and puffy cumulus clouds.  An aroma like that just cannot be duplicated anywhere else, other than in freshly washed fabric, blown in the wind and lovingly gathered in a basket.


2) Saving money and electricity.  Once the clothesline is operational again, I don't ever want to use the dryer.  Even with an energy efficient one, it still uses a lot of electricity, which means I subsequently contribute more carbon emissions into our saturated atmosphere and I end up with a higher municipal electric bill (and those puppies are bad enough as it is!).  It isn't any less convenient to do laundry this way, it just might take a little more planning, but as I may have mentioned before, I love to plan.  Just check the weather forecast for the next few days and the night before a nice day, pop a load into the washer before bed.  When you get up, you can put it on the line, then take it off by lunchtime to stick another load on for the afternoon.  Who really needs to do more laundry than that a day, if you remember to do some every nice day that you have?

Note the fleece baby clothes and the absence of emerged leaves in the background--oh! To have a truly warm spring arrive...
3)  Keeping your clothes more organized.  Now, I realize that this may sound at first like I have some sort of a problem, but I swear it works really well.  When I am hanging the wet clothes on the line, I like to pre-sort them into certain categories.  For example, large and small items, pants, shirts, onesies, socks, underwear, etc.  Then I keep each item with its own kind.  When you then come back to pull them in, they are already in a very efficient, handy order.  When you fold them (which is also easier, since the legs of your skinny jeans are not tangled around the sleeves of your favourite henley, and your diaper cover velcro is not firmly attached to a knit acrylic sweater), you can stack them according to where they need to go without losing time sorting them.  Oh Craig, you're looking for your socks?  They're all here.  Need to run a few things down to the kids' room?  Here they are, all in a pre-established pile.  I love it.  (Some people I know, based on other aspects of my life, such as my old work desk that was covered in used tea bags, papers, photos of family, spare socks, and bits of random leaves and other plants that I collected in my wanderings, may have trouble believing me to be this obsessive.  But I swear, I can be quite organized in other areas!)

Here they are: Susannah's onesies (and sleepers in the background) are sorted before they're even dry!

4) The quiet, contemplative time it give a busy schedule.  Now I do not claim to particularly enjoy doing laundry.  Quite the opposite, in fact, I'd much rather wash dishes.  But clotheslines make laundry fun again.  Why?  Yes, it may take longer, but those 10-15 minutes that you spend pinning the clothes on the line and then taking them off to bring inside are 10-15 minutes of peace, fresh air, and opportunity to quietly think without interruption that you really wouldn't have otherwise.  I like putting the clothes on the line when Susannah is napping (9:30-10:30 am, and 2-3 pm) and James is either playing quietly in the yard or asleep.  I listen to the sounds of the neighbourhood: to birds singing and leaves rustling in the breeze and neighbours walking their dogs and taking out the garbage and puttering about in their yards.  I breathe the fresh air and think about what I need to get done that day, or how much I love my family, or about the book that I can't wait to get back to, or about my prayer life, or just about how much I like doing laundry again.  It's a mindless but focused activity that just feels good and gives me a quick breather.  Ahhhhhh.

I think the photo says it all. :)
Not sure I can really express how much I love this picture and the little bum that fits in these covers.
5)  A glimpse into a person's life.  Now I'm not particularly nosy, it's more that I have a keen interest in other people and a vivid imagination, and as a biologist, maybe a stronger than normal appreciation for detailed observations.  But when I see a neighbour's clothes out on the line, I absolutely love that it is an opportunity to peek into his or her life and form a picture in my mind of what that life is like.  Clothes tell a story about the person who wears (or line dries!) them, and some very personal information can be hung out for all to see as it flaps in the breeze.  One glimpse of a clothesline is like the briefest character sketch about the people surrounding you every day, and gives you a chance to get to know each of them a little more deeply than you previously did.  It reminds me of what one of my aunts, who has a heart for things poetic, said a few years ago after the fall time change: "I've made friends with November."  She was referring to the fact that after the clocks go back, you can easily see inside the homes of others when it's dark outside and their lights are on.  You can see them gathered around a kitchen table together as a family, or cleaning the living room, or reading near a cozy fire.  It isn't that you want to know their business, so much, as that you can appreciate the simple beauty of knowing that these people (who you may or may not speak to on a regular basis) are just like you, living just as you do, a few doors down from you.  It makes the world seem smaller, more friendly, more connected in these days of such a busy pace of life.  And I love a good story.

Lamby (and his twin brother) is a very important member of our family.


Tuesday, April 24, 2012

To Meal Plan or Not To Meal Plan

Trying to figure out what to make for supper each evening actually keeps me lying awake in bed at night.  Really.  I lie there, thinking about what Craig will like, what we have already eaten recently, as he is a real stickler for not repeating meals too closely in succession, what Susannah will eat, and what our picky, stubborn, unwilling-to-try-anything-new-or-green James will possibly consume.  Flashes of what I have in the fridge and pantry and what various combinations they can work together to become dance in a whirlwind through my mind, and it takes me a while to figure it out.  This is why I really need to meal plan, and I like planning my meals.


When I recently read this post at Frugally Sustainable (a great blog!), it made me wonder about what exactly people do when they plan meals.  Her three reasons against meal planning included (1) it costs more, (2) more food is wasted, and (3) the inflexible nature of the meal planning can be stressful.  Her point was that rather than planning meals, we should keep stocked pantries and use what we have on hand for meal preparation.  I liked the post but it really made me blink; none of those points seemed to gel with my experience of meal planning at all, but it seemed to really resonate with other readers.  So I think I need to clarify why, while I agree with the pantry stocking, I disagree with the meal planning points.

1) It doesn't cost more.  Well, it shouldn't.  If you are randomly picking out fancy recipe ideas from within the pages of the newest Martha Stewart Living, and they require lemongrass and tandoori masala and cardamom pods and those three ingredients don't happen to be in your pantry at the precise moment (actually I have everything but the lemongrass so obviously my imagination isn't very far-reaching tonight!), then you're going to go out and spend more on groceries than if you were just buying your regular basics.  But that is not how I do things.  Instead, I:

  • pore over the flyers and write down the best deals on everything from meat to pasta to celery to cheese from all the local grocery stores
  • assess what I have in my pantry and fridge, which includes things I bought multiples of the last time they were on a good sale (such as whole wheat pastas, seeds, canned salmon, carrots,  onions, cheddar, etc.) and what I bought in bulk the last time we were at CostCo (e.g. 10 kg bags of flour, 6-pack cases of passata, 1 L jugs of maple syrup, 1 kg bags of nuts, dried herbs, etc.)
  • sit down and figure out what I can make from a combination of what I already have on hand and what is on sale. I try very hard not to buy things that aren't on sale.  And then I write out a tentative schedule of suppers for the next 7-10 days, based on what I came up with from these options.  The end result?  Our grocery bill goes way down.

2) Waste?  What waste?  OK, not absolutely everything that I prepare gets eaten to the last morsel with plates licked clean.  Just check under the high chair after supper is over.  But honestly, we really don't waste much food anymore.  If I make meals like casseroles or things that don't freeze well, Craig takes the majority of our leftovers to work for his lunch.  If I make a meal that does freeze well, then I try to make two (or more) meals at the same time, and eat one, and freeze the other.  That way, if we don't feel like having spaghetti again tomorrow, we have another quick-to-prepare meal waiting in the freezer.  Freezer stocking isn't just for pre-natal planning, you know!  Additionally, I try to turn whatever we had into something else.  Here is an example:

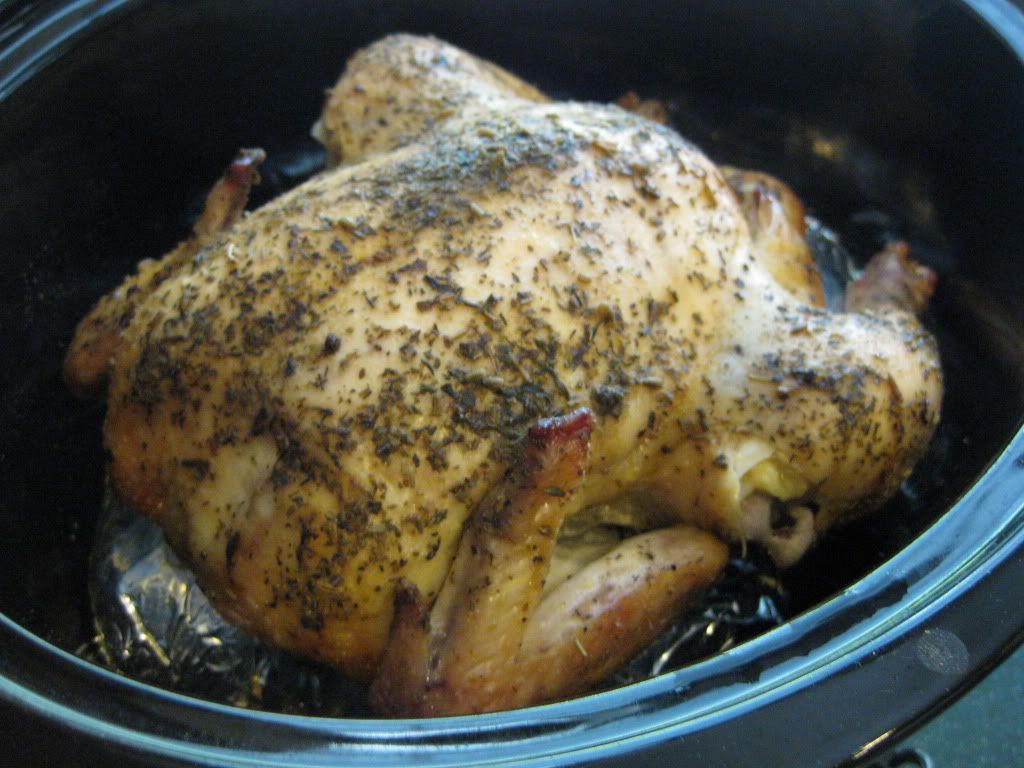
Tuesday, April 17th:  Rosalyn cooks a 3 1/2 pound chicken (about $6.57) in the slow cooker.  We have chicken dinner that night (with extra gravy thawed from the freezer where it was stored after a previous chicken dinner).

Note: this is not my photo, but my chicken DID look like this!
Wednesday, April 18th: Rosalyn (who put the bones, skin, and less choice bits back in the slow cooker with veggies and water and delicious herbs to simmer for 12 hours overnight to make a great chicken stock) makes homemade chicken soup for supper, served with toasted slices of homemade bread and pieces of cheddar.  Not fancy, but yummy.  It made enough to serve all of us one supper, put another supper's worth of soup in the freezer, and two small individual lunch-sized containers, one in the freezer and one in the fridge, for Craig to take to work the next day.  So two family suppers, and two one-person lunches.

Here's Craig's lunch.  OK, you can't really see the soup very well, but I took it after I made it because I wasn't planning on writing about this!
Thursday, April 19th: Rosalyn uses the very last of the cut up chicken meat to make quesadillas, served with Mexican rice on the side.  Side note: quesadilla technique needs work.  However, it was another quick, easy meal made with leftovers, and there were plenty of quesadillas so Craig took the last two "wedges" as an accompaniment to his lunch the next day.

Quesadilla and Mexican rice with sour cream, forgive the less than photogenic serving.
So first of all, I stretched a 3 1/2 pound chicken to cover four supper meals, plus a couple of lunches for Craig.  Obviously, it can go that far when the children are still very little and eat negligible amounts of it at this point, but still.  It's not impossible that a larger family (or one with larger children) couldn't make a larger chicken go just as far.  Second, not once, in the planning or preparation of those three meals did I have to run to the store to buy anything.  I used things in my pantry and fridge.  None of the chicken was wasted, and nothing extra needed to be purchased.  Expensive?  No.  Wasteful?  No.

3) Stressful? Not for me!  So this will totally depend on your personality.  I have always been a planner, so of course planning doesn't cause me any undue stress.  But even if that's not really your personality, if you are juggling children, housework, cooking, gardening, dog-walking, working outside the home, grocery shopping, studying, library-book returning, or any combination of various and sundry tasks, then I don't really think it matters if you are the strictest, most obsessive planner on the planet or a free-spirited whimsical fairy of spontaneity.  Meal planning will help you survive. 

You are not carving the meals in stone, like the ten commandments.  No one is going to criticize you if you switch Sunday and Thursday meals because you decided to do some shopping, or drive to the beach, or relax on the sofa with a chai latte while the house imploded around you.  I would wager that, if your household is anything like mine, no one even knows what you planned for the week's meals, if they know you meal plan at all.  It is one of those little details they don't have to worry about, because you take on that agony joyful task with a light heart and unbridled enthusiasm for the good of your family.  It's still flexible.  You can look at the list and mentally change the places of things.  What it gives you is the peace of mind that you know what you have in the house, you know what you're going to do with it, and you don't have to come up with anything at the last minute while your fourteen-month-old screams at you from her high chair because the potatoes haven't boiled yet.  In the case of the chicken, yes, I did plan ahead and I did stick to the schedule, because I didn't want to freeze any (this time.  Last time, I froze extras and then later mixed them, and broccoli, in with homemade mac and cheese. Yum.).  If you decide you don't want to deal with the leftovers now, freeze them!  You'll be glad later that you did.

The verdict?

So yes, by all means keep your pantry stocked with items that go on sale that you know that you will use (don't stock it with 59 cent cases of canned mushrooms when nobody in your family will eat them).  A stocked pantry means you have most of what you need, when you need it.  Flyer shopping will help you get the best deals and cut down on your grocery bills.  And meal planning will keep you sane, and save you money at the same time.


Sunday, April 22, 2012

A Little Love for Planet Earth and the Outdoors

In our house, Earth Day (April 22nd) is a real holiday.  Not something you notice when you are reading the paper that morning and there is a fleeting mention of energy consumption or trees planted by local schoolchildren, but a holiday that we, as a family, observe.  For me, it comes third only after the faith-based biggies, Christmas and Easter.  Well, Thanksgiving is pretty important too, but I think of Earth Day as another thankfulness kind of holiday too.  Making a point to appreciate this gorgeous world that God so graciously gave us, and remembering that He also gave us a responsibility to look after it.  So today, on Earth Day, please make an effort to consume less, think more, and spend time outside enjoying our Earth with your family.

We celebrated yesterday, as the weather forecast for today was rainy and we wanted to make the most of the sunshine.  We went out to the National Park for a picnic lunch and a family hike, and it was beautiful.

Craig helping Sus eat her sandwich.

Loves his banana chocolate chip muffin!

Wants her independence but is not interested in touching the grass, so needs a hand getting back up!

Oooh!  I just touched it!!

Having a little rest, that pack is heavier than it looks!

Cozy and safe, and a great view to boot!

James loved running down the steep boardwalk.

There's a fly on my hand!  (I loved his reaction, joy, not fear or disgust!)

Saturday, April 21, 2012

Homemade Thousand Island Dressing


We haven't been eating very many fresh greens lately and I have been craving a salad.  My husband's favourite salad dressing is Thousand Island, and we didn't have any (well, technically we do actually have a bottle in the fridge that I have not yet removed although it expired months ago--we don't eat a lot of salads when it isn't barbecue season).  I really wanted to have a salad tonight with supper, so I looked up homemade thousand island style dressings online, and combined a few to make this.  It's super easy and it tastes just as good (if not better, with a bit more oomph!) than the bottled variety.

Some day maybe I'll really make it from scratch with homemade mayo and ketchup but for now, I'll do it the easy way, with the Hellmann's and Heinz varieties.  The great thing about this dressing is I can pretty much guarantee you have everything you need in your house right now!


Thousand Island Dressing


1/2 cup mayonnaise
2 tbsp ketchup
1 tbsp white vinegar
2 tsp sugar
2 tsp sweet pickle relish
1 tsp finely minced onion (I used Epicure 3 Onion Dip Mix to make it even easier)
2 shakes of Worcestershire sauce
a couple shakes of salt
some freshly ground black pepper

Whisk together in a bowl until smooth and creamy and spoon over a fresh salad, in this case, romaine lettuce, diced red onion, grated carrot, and walnut.  Yum.  I love pantry staples turned into something easy and yummy!

This post is shared with Homestead Barn Hop #59 at The Prairie Homestead.

Friday, April 20, 2012

The Most Basic Compost Pile in History

I'm new to this homesteading stuff, and I don't have a big budget to spend on things like fancy composters.  That doesn't mean that I don't want a nice, free source of compost for our garden though.  So I decided to start my own compost pile.  And it took me about an hour.  That is because I had to first rake up the piles of material that would make it up.  So really, it took more like ten minutes.

I first cleared out an area in the bottom corner of my yard, which is surrounded by shrubs, is the furthest common point from any of the surrounding houses, and is sort of ugly anyhow.  I'm just going to warn you now that I would not be graciously given any photography awards for these photos.  They are pretty blurry, bland, and in general poorly lit.  But they illustrate what I did, so bear with me!

The bare corner in our yard about to be transformed into a marvel of aerobic decomposition.

So I had this awesome idea (and I thought myself quite brilliant) that I would put the sticks at the bottom for three reasons: (1) they would take longer to break down, so I wanted them closer to the ground where my little decomp soldiers are hanging out, (2) they would prop up the compost pile and aerate it from underneath, and (3) they would help with drainage because this is a rather damp corner in the spring.  After checking a few websites online that dealt with an actual pile and not some fancy rotating drum, I came across one that said "lay your twigs down first to help with drainage and aerate the pile".  So I felt quite validated and confident in my compost decision making.

The bottom of the pile.

A wiling young helper carrying sticks never hurts the success of your compost pile, either.

So then I started taking the old leaves and little twigs that accumulated in our yard over the winter (I swear we did a good job raking last year and had loads of bags for fall clean-up!), and putting them on the pile.  Two things that made this easier and faster:  I had done most of the raking on March 22nd when it was 25 degrees (what?!?) and we were thriving in the sun, and I used our brand-new-to-us wheelbarrow that my mother-in-law generously gave me and her wonderful brother drove up to Summerside to deliver (he also brought in our waste cart).

Not quite finished yet, but it was geting late and I didn't know if the camera would work when I finished.

Here is my "finished" compost pile; I now have a very tidy backyard and a wonderful start to composting excitement.
So I am aware that everything that I put in my pile today is "brown" material, and I need to layer it with "green" material.  I just wanted to clean up our yard and get the pile started.  Before I came in, I watered it to dampen the material.

Side note: is anyone else worried about how dry it is this spring?  The clouds of dust coming up as I was raking this stuff were crazy!!

Anyway, as I collect vegetable scraps and whatnot I'll take them out and layer the compost and sprinkle water on it and turn it and cover it to warm it up and love it in general.  Now this is not the most sophisticated compost pile in the world.  It doesn't have walls, it doesn't have a sleek round body with hatch and turn-crank, it isn't even a barebones structure made with pallets.  But for the moment, it will provide habitat and cover in our backyard, it will eventually decompose, and it provides an out-of-the-way place to store our yard waste (and soon to develop chicken poo!), and I'll be able to use it, some day, to feed my lovely veggie plants.

I like it.  Make your own!

This post is shared with Homestead Barn Hop #59 at The Prairie Homestead.

Thursday, April 19, 2012

6 Little, Easy Ways to Be More Frugal

I like living simply, and I love doing things for my family with my own two hands.  I'm learning more and more every day, and I love the way that creating things that my family needs with my own know-how and with items that I already have in the house allows me to be more frugal.  This is especially important to me right now as I am going back to university in the fall, which is a pretty expensive prospect when you have little ones at home, and jobs aren't exactly growing on trees at the moment, particularly in the conservation field.

Some of these homemaking activities require (or will require, as I haven't started them all yet!) time and commitment and work, but for me, they are so rewarding that it doesn't matter.  It's actually kind of addictive, and Pinterest and blog-reading are fuelling the fire.  Oh--you make your own deodorant?  I should try that!  You have a recipe for homemade ginge rale? Sign me up!  You sewed your own apron which beautifully gathers so you can put your freshly plucked organic vegetables in it when out in the garden?  Where is the pattern?!

Obviously, I'm just starting down this path.  There are oodles of people WAY ahead of me.  And maybe, some people who drop by this blog are with me in the early phases or are just figuring out that they'd like to explore these ideas a little more, which is why I am including a few easy ways to live more frugally and do things for yourself, by yourself.  You can be kinder to the planet, have fun with items already in your home, and save a few pennies (or soon-to-be nickels, in Canada I guess!).  Some of these you've seen before in blog posts, but I thought it would be fun to do a quick review in a list format!


 1.  Make your own bread.  Really.  It isn't hard to do, and this recipe is super easy, forgiving, adaptable, uses less yeast so even less expensive, and it's no-knead.  You mix it up, leave it alone, come back, flip it around a few times, put it in a pan, give it a break, then put it in the oven.  Before you know it, your house smells like a bakery and you feel a sense of accomplishment.  It tastes way better than what you would buy in the store, for a fraction of the cost and probably even saves time in the long run because you don't have to drive to a store, pick out a loaf, wait in line at the check-out counter, get home and put it away. :)


2-3. Grow your own vegetables.  This one is sort of a frugality double whammy, are you ready?  Grow your own vegetables from seed (all of them) rather than buying the seedlings at the garden centre.  This is loads of fun, gives you an activity to interest your active three-year-old son and prevents him from endlessly, noisily crashing his cars around you, or colouring on your bedroom door, and costs less than buying the seedlings (which in turn costs less than buying the full-fledged vegetables).  Frugal tip number three: grow them in cut up toilet paper and paper towel rolls.  Save them and then plant in them when you need to.  They hold the soil, can be planted as they are in the ground because they'll decompose and you won't have to disturb the roots shaking them out of the pot, reduce household waste, and save you loads of money on unsustainable peat pots.


4. Save your eggshells for your garden.  Egg shells break down in the soil, add to the compost that you are hopefully already adding to your garden, and provide much-needed calcium to the most beautiful of all garden crops, tomatoes.  Also, slugs don't like to cross them so they can act as an effective barrier to those horrid slimy creatures (and as a biologist I say that with love and no discrimination against a natural creature of any kind).  If you eat lots of omelettes or angel food cakes, you'll collect quite the pail-full of these in no time at all, and your afore-mentioned three-year-old boy will love helping you crunch them up!


5. Use vegetable crisper compost to make new veggies!  Specifically, celery (above) and green onions (not pictured).  I don't know if there are other veggies you can do this with but these are the two I've tried.  When you cut them back to nothing and all you have is the bottom of the celery or the silly little white onion bulb from the green onions, just as you're about to toss them in your compost bin, think again and stick them in a glass of water.  They'll grow and you can harvest them again!  Gets you a lot more bang for your 99 cents (or $1.49, if it's the celery and it's on sale!).  It also provides a fun little experiment for your kids and it doesn't take long--those celery leaves are 5 days old.


6. Use orange peels to make your own environmentally friendly household cleaner.  Have you noticed yet that I save a lot of garbage?  Toilet paper rolls, egg shells, celery bottoms (what is the correct term for those anyway?) and now orange peels.  And it's not only me saving them, I have my parents and my sister saving them for me too.  And I require that my husband take home the orange peels leftover from his lunch.  But I like this cleaner, it's fun to make, smells better than cleaning with straight vinegar and it only takes a few minutes using something that would end up in your compost bin.

I love little tips like these!  Please share yours and I can delightedly add to my little rituals of using weird items to cut down on waste and create great new things.

Wednesday, April 18, 2012

Guest Post: Kitchen Tour at A Flock in the City

I have a guest post today over at Tamatha's "A Flock in the City".  A few weeks ago, she posted a wonderful tour of her amazing kitchen and when I gushed about it in the comment section, she invited me to do a guest post sharing my own kitchen on her blog, which I love.  I was pretty excited, to say the least, because since blogging is fairly new to me this was my very first guest post, and I love kitchens!  Please visit my post there and then check out her incredible recipes, how-tos, and backyard barnyard stories.  You'll love her baking, goats, homemade ginger ale, and chickens...


Monday, April 16, 2012

Chickens in the Suburbs

I haven't posted very much the last week because I have been living a whirlwind.  I have a lot to catch up on, but wanted to briefly mention that I just walked in the door from the Summerside City Council meeting where my permit application for four laying hens was approved! (See previous posts here and here.)  I am so excited and feeling so positive about the support that our city has shown for our community garden initiative and my laying hen application.

I know that each municipality will have different application requirements, but I thought that by posting my final application letter, it might give other hopeful chicken aficionados at least a starting point for information to include.  So here is the body of the letter that I wrote:


Further to our conversation on February 8th, 2012, I am submitting my formal application for a permit to house four pet laying hens in our backyard, which is within city limits.  I have obtained the signatures of residents in the twelve houses that are within 200 feet of our property, and include these signatures on the appropriate form with this application.  For those residents with further questions, I addressed their questions and/or concerns while speaking to them and gave them an informational handout that addresses the most common questions about backyard laying hens (a copy of this handout is also included in this application).

These hens will be considered family pets, not livestock, and will be kept for enjoyment, eggs, and as a way to educate our children on the responsibility of raising animals and the knowledge of how and where we get our food.  We are concerned about the inhumane conditions that industrial laying hens are exposed to and, while we do enjoy eating eggs, we prefer to get our eggs from hens that are happy and allowed to live comfortable, natural lives.  We will make an effort to ensure that the hens are docile, gentle animals, and we will treat them with the respect that any pet or living creature deserves.

I live in the ________ subdivision in Ward 8 (Wilmot), and would like to build an attractive and secure coop in my backyard behind my shed where the chickens would be out of sight and protected by trees and shrubs.  I am applying only to have female laying hens, and as there will be no rooster, there will be almost no noise associated with these chickens.  I have decided upon a coop plan, and will connect the secure, warm, and safe coop to a fenced-in outdoor pen that will allow the hens to safely and conveniently make use of the outdoors for exercise and feeding.  The pen will have wire on all sides, including the top, to keep out avian predators.   This pen will most closely resemble a modified dog run.  I have attached a copy of the chicken coop plan with this application; the pen will be planned more in detail when the coop is built and the site is further assessed in the spring for how to best go ahead with construction.

Waste litter from the chicken coop will be composted on our property in the bottom corner of our yard where it is protected by shrubs and trees and is at the point furthest from all surrounding houses.  It will contain yard waste such as fallen leaves and twigs, and be managed properly (turned and aerated regularly) so should not produce any offensive odors.  The chickens’ feed will be kept indoors so as not to attract any unwanted pests.

I have good relations with my surrounding neighbours and plan, if this application is successful, to deliver fresh eggs a few times a year to the households immediately adjacent to our property and offer rich compost to those who garden in order to keep up a friendly and positive outlook regarding the hens.  We currently do not own any other pets.

I understand that a city official will visit our property to take photos of the backyard and the location where the chicken coop is to be constructed, and will inspect the property at that time.

I trust that I have addressed the questions and conditions associated with this application, and I hope to hear from you soon in this regard.  Thank you very much for considering my application.

I can't wait to post the pictures of our coop and newly acquired ladies!  In the meantime, send me your best chicken care tips; I have lots to learn!


Wednesday, April 11, 2012

Growing a Sourdough Starter from Wild Yeast

I should say before I write anything else that I am NOT a sourdough expert.  I have not yet baked a loaf of sourdough bread.  My sourdough journey is in its initial, tentative steps.  But I have successfully gotten a sourdough starter going from wild yeast, and I am quite proud of it.  I can get you at least that far, and then hopefully if you return to my blog I will have had luck with the baking step--if not, I'll be pointing you to other blogs and websites for further reference!

I have seen recipes for sourdough online, and in my favourite cookbooks, and most of them start with a "cheater" starter using commercial yeast.  That's ok, if it turns out for you and you like it, but being a biologist I thought it would be a lot more interesting to start my own.  When I read that you could "capture" wild yeast to develop your starter, it sounded infinitely more exciting to me!

It is so easy to do, and I am glad that I tried.  I even abused my poor starter a little bit, and it is still going.  It needs to get a little stronger before I attempt bread again (my first shot at it was pretty miserable) but even the fact that it is living on top of my fridge seems amazing to me.  I got the instructions/recipe for one technique of getting a starter going from this post on The Fresh Loaf website and followed the directions with the ingredients that I had.  It takes time to develop a starter, it is certainly not closely related to instant or even regular active dry yeast.  It takes patience, clean dishes and hands, and a lot of love.  But you can totally do it in your kitchen!  All you need is some whole grain flour and pineapple or orange juice.  So let's get started:

As you can see, I used regular Robin Hood whole wheat flour.  I think if you can get organic stone-ground rye, like I have since purchased from the Bulk Barn, it would be better.  However, mine worked with the flour I used.

Day 1
Combine 2 tablespoons of whole wheat or rye flour with two tablespoons of juice. Mix well, and cover lightly (I used a piece of cotton dishtowel held in place over a mason jar with the screw band).  Keep it in a warm place, like on top of your refrigerator.


Day 2
Add another 2 tablespoons of w.w. or rye flour and two more tablespoons of juice.  Mix well again, and re-cover.

Day 3
Add yet another two tablespoons of both flour and juice.  Mix it up, cover it up, sing it a little song.

Day 4
Open up your starter, stir it all up, measure out 1/4 cup and then discard the rest.  Wash out your jar, and return your 1/4 cup of starter to it.  Then add 1/4 cup of unbleached all-purpose flour, and 1/4 cup of warm filtered water.  Stir it all up nicely, cover it back up, and put it back in its warm little nook.

After Day Four
Continue the Day 4 steps of stirring, discarding, and adding flour and water to it until you start to see some really bubbly action, the starter begins to expand, and you smell a characteristic yeast scent when you give it a sniff.  I'd keep it going for a while.  I noticed my starter took off in the evening of day 5, but I am now at day 15 and still have it on my counter, feeding it at least once daily and sometimes twice if I think it seems hungry.  You want to get it strong enough to to really be able to leaven your bread when you use it to make a sourdough loaf, and it takes a little while to get there.  Some people recommend at least two weeks.  Trust me, you want it strong.  I would show you a photo of my horrible first attempt at loaves if I hadn't been so ashamed of them that I threw them out to the birds and didn't take a picture!

My sourdough starter on Day 7, ready to be fed.

According to SourdoLady (the user who posted the procedure on The Fresh Loaf), when you feed it you can actually keep less starter than even a quarter cup, for instance 1-2 tablespoons.  I personally keep holding onto 1/4 cup because I am worried that something will happen and I will have thrown it all away and have to start over again.  But you should give it more water and flour in order to feed it properly.

To feed your sourdough starter, it is basically the same as the Day 4 step.  You discard most of your starter, mix it up with flour and water, and let it go crazy eating and growing.  From what I have read, you should feed it equal portions by weight water and flour, which comes out with a quantity of almost double the flour if you measure using cups.  Basically, when you mix it up, it should look like thick pancake batter.

When your starter stops expanding, starts to sink back down, begins to smell more like alcohol than yeast, and gets a layer of clear or yellowish liquid near the top, it is hungry and really needs to be fed.  After your starter gets going and becomes strong, you don't have to keep it at room temperature anymore.  You can feed it, put it in the fridge, and leave it.  Weekly feedings are recommended but if it's strong, it can go even longer than that and still be revived when you take it out to get it ready for baking.  I really should have taken before and after photos to show you the difference in volume from where it starts before a feeding and ends up later; I may edit this later and add one in. :)

Starter on Day 10, ready to be fed.

The way I have described feeding it, you'll never really have more than about 3/4 cup of starter, and when you bake, you'll probably need at least a cup plus some left over to keep your starter going for the next time.  If you want to increase it, the feeding before you plan to use it (say the night before), just give it a bigger feeding.  That will increase its volume to what you will need.  And when you feed it, the quantity that you discard can be put to use; it doesn't absolutely have to be thrown away. You can give it to a friend to start his/her own starter, or you can use it in a recipe like sourdough pancakes (note: I haven't made these yet, they're on my to-do list and if anyone is interested I'll post the results up here when I do it).

Good luck!  I am still learning, and my starter has in the last couple of days had a couple of near-death experiences.  If you check out the post I linked to earlier where I learned how to do this and have a look at the enormous comment thread, you'll get loads of help.  Also check out this post by Tamatha at A Flock in the City; she is amazing and knows all sorts of things about baking and fermenting and looking after various cultures.  She actually posted a sourdough bread recipe today, than I plan on trying as soon as my starter seems a bit more hearty!

This post is shared with Simple Living WednesdaysFrugal Days Sustainable Ways and Homestead Barn Hop #58.

Sunday, April 8, 2012

Oatmeal Whole Grain Pancakes

We love eating pancakes.  They are frequently requested by James, and we eat them almost every weekend.  Sometimes I even make them throughout the week.  Now that we have young children, I find that one of the best ways to visit with our friends who also have children is to host breakfasts rather than suppers--everyone is fresh and at their best for the day (and we're all up early anyway), you can cook a no-fuss meal and be completely casual and relaxed, and after breakfast you still have time to visit while the kids play. Once everyone goes home, there's still much of the day left to get things done, spend time with family, do your grocery shopping, go to the park, etc.

This recipe is a great one if you are having friends over (or if you have a lot of children!) because it makes so many pancakes, and with the oats and whole wheat, you feel a little better about serving them.  If we make it for our family alone, the leftovers are still great popped into the toaster through the week for a quick breakfast or snack.  My mother-in-law gave me the Robin Hood Home Baking cookbook last year for my birthday, which is where I got this yummy recipe.  And I haven't made anything in that cookbook yet that hasn't turned out to be delicious.  This one, however, is the recipe that we most often prepare!

The necessities.  And despite the supermarket egg carton, those are farm fresh eggs from the Summerside Farmers Market!


Oatmeal Whole Grain Pancakes - adapted from Robin Hood Home Baking

1 1/2 cups rolled oats
2 cups milk (*or almond milk, if you're dairy free*)

3 eggs
1/4 cup vegetable oil
1 tsp vanilla

1 cup whole wheat flour
2 tbsp brown or granulated sugar
2 tbsp baking powder
3/4 tsp salt
1/4 - 1/2 tsp cinnamon

In a small bowl, combine milk and oats.  Set aside until milk is mostly absorbed.  Meanwhile, preheat your griddle to about 350 F.


In a large mixing bowl, combine flour, sugar, baking powder, salt, and cinnamon.  Stir well.


Add eggs, oil, and vanilla to oat mixture.  Beat well.  Add oat mixture to flour mixture all at once, mixing until smooth.

I promise I put vanilla in there too!  Just not before I took this picture.

Here it is, ready for the griddle.


Spoon batter by 1/4 cupfuls onto griddle.  Cook for 2-3 minutes or until bubbles break on the surface and bottoms are golden, turn and cook for 2 or so minutes more until bottoms are lightly browned.  Serve hot with maple syrup, fresh fruit, yogurt, caramelized apples, whipped cream, etc.


Mmmmm... yummy pancakes.  I'm sorry I have to leave you with this photo, but we got so busy eating them that I didn't take a "pretty" photo of them stacked on a plate and drizzled with beautiful Canadian maple syrup!
I hope you enjoy this recipe as much as we do!  And that you're having a wonderful and blessed Easter holiday.  He is risen.

This post is shared with Homestead Barn Hop #57 at The Prairie Homestead.